


Table of contents
This article covers Redux Toolkit implementation with a project. If you don't know about Redux then you can read this article Reudx Article
I have Divided the Redux Toolkit into two parts, The Redux Toolkit Part 2 is focused on Thunk Middleware and Extra Reducers, you will find the link at the bottom.
Redux Toolkit
Redux Toolkit is a modern and recommended approach for writing redux logic. Now you don't need to worry about writing action creator, action, middlewares, combine reducers, or adding Redux dev tools. Redux Toolkit will do everything for you. So without wasting time let's jump to the fun part.
I have already created a project to explain the Redux Toolkit. Let's clone the project
git clone https://github.com/codewithas1/ReduxToolkit.git
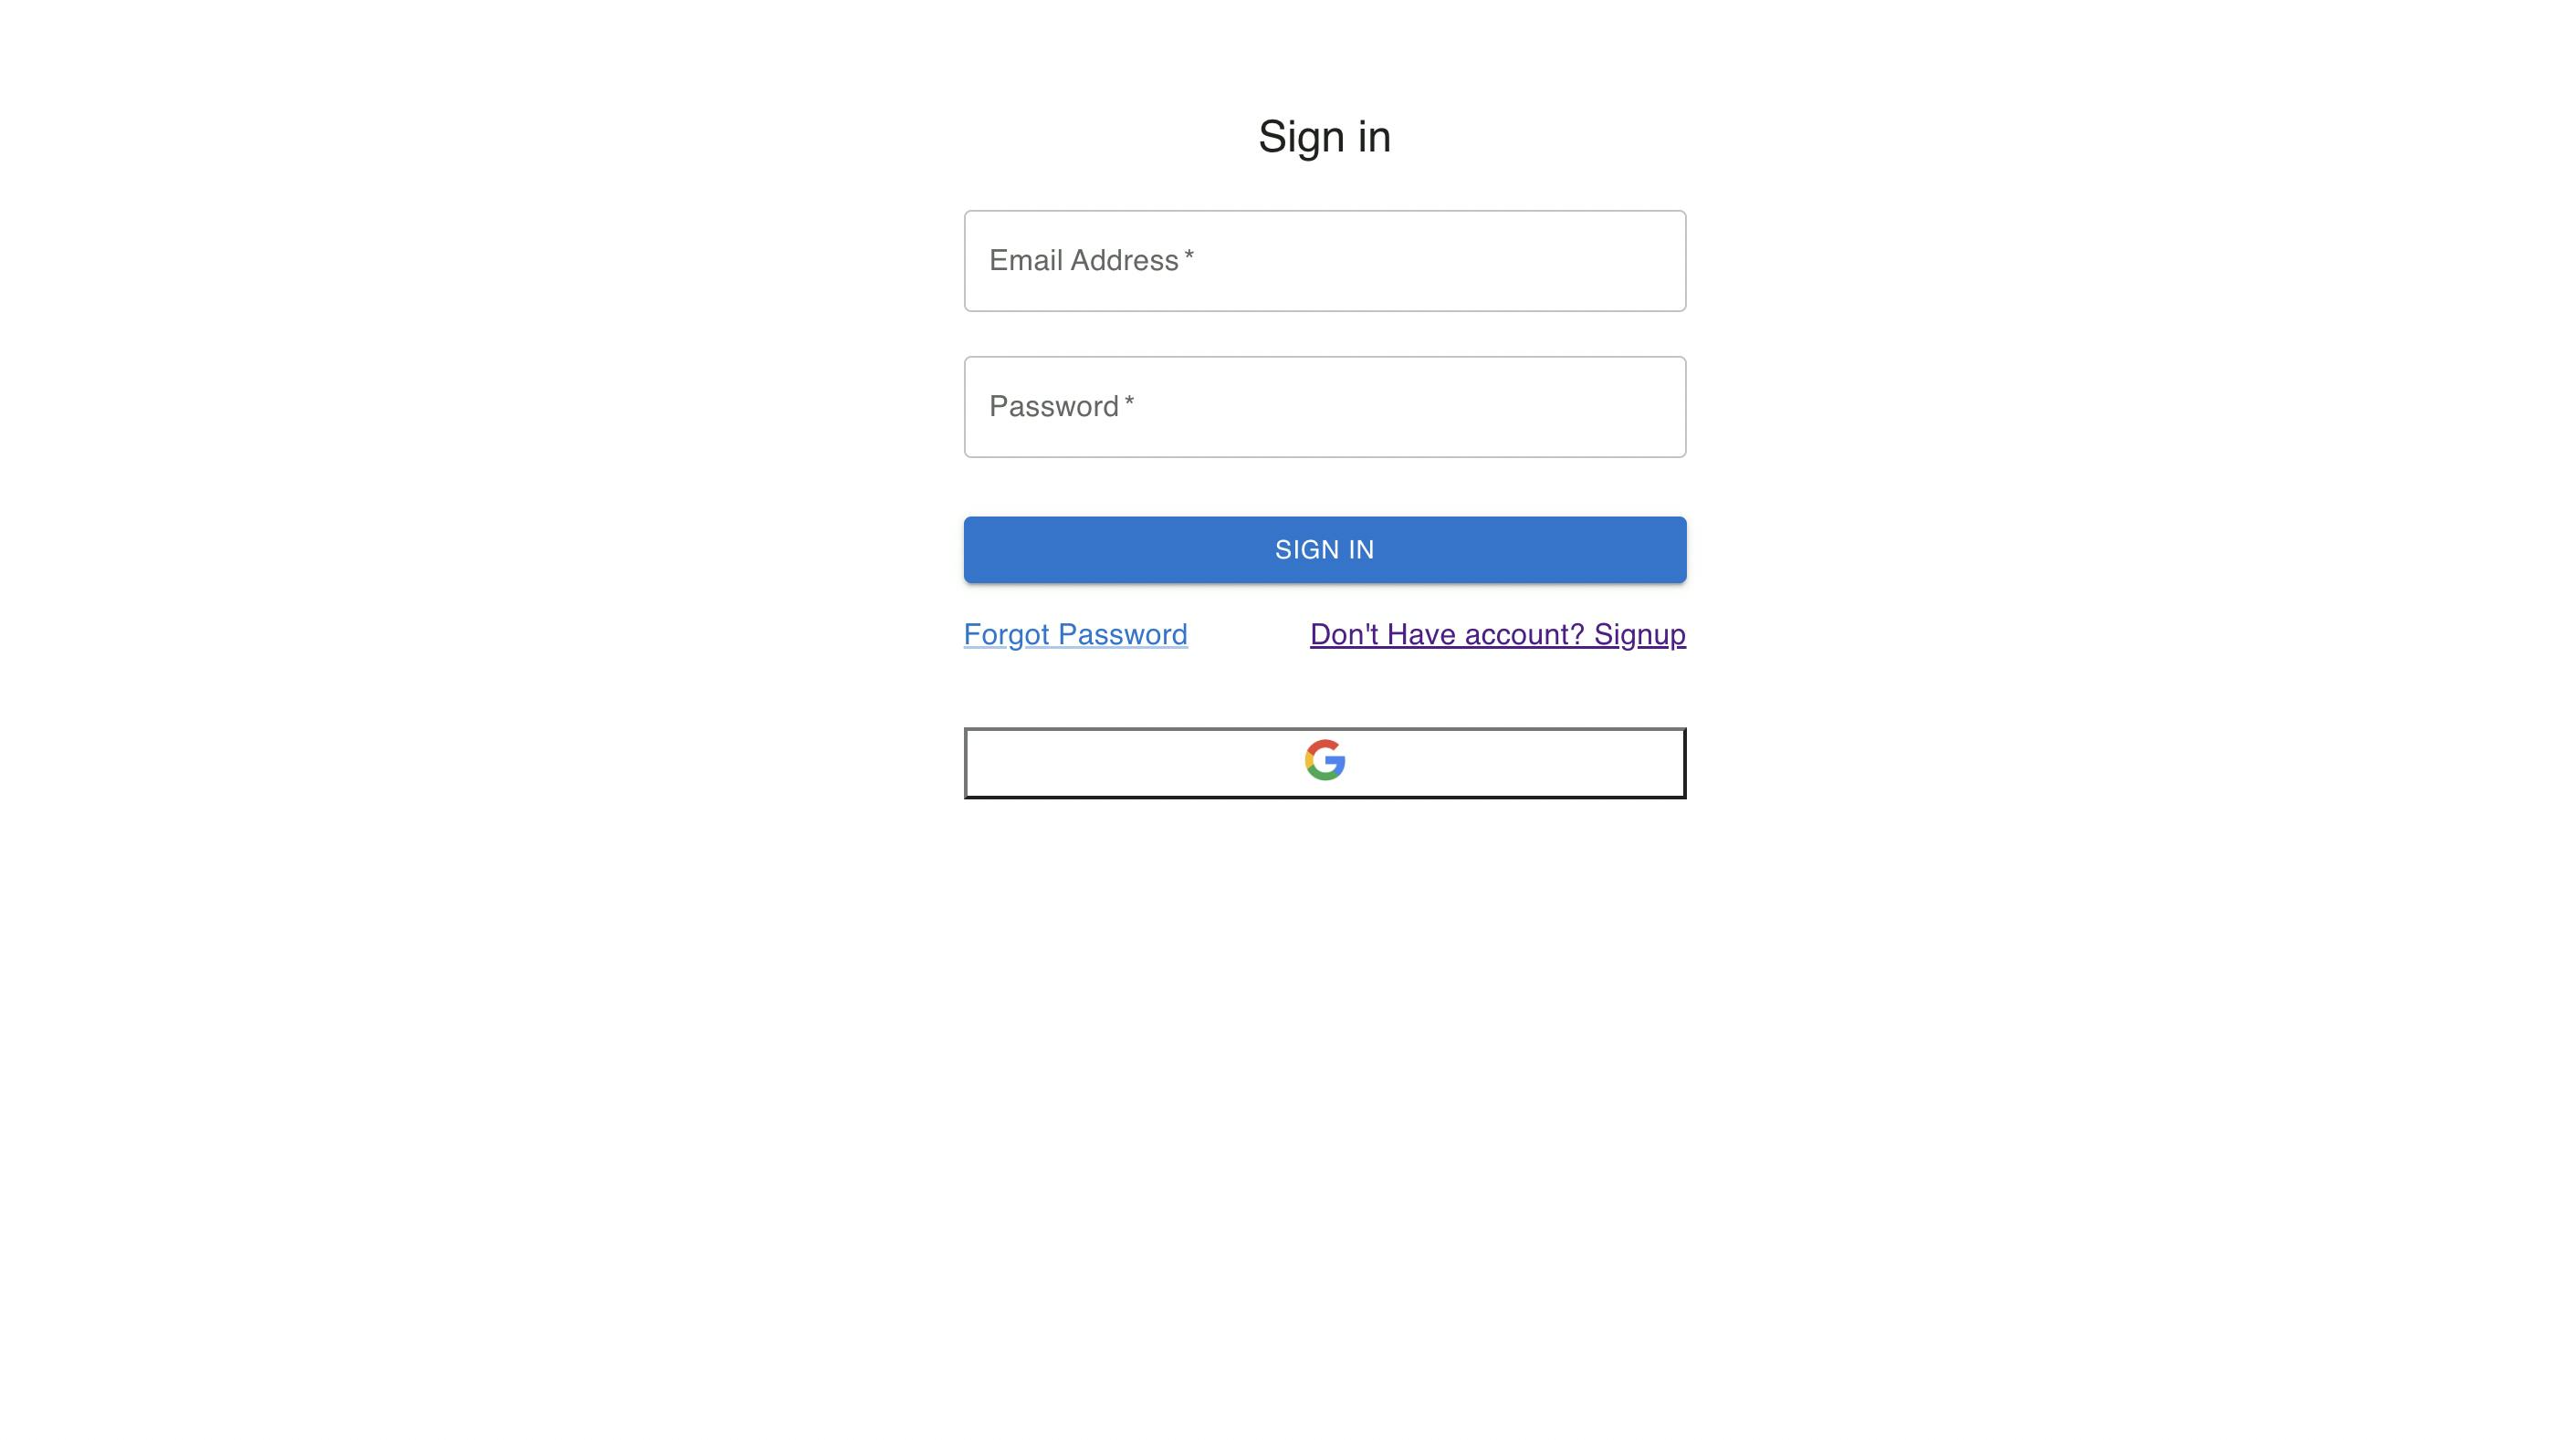
I created this project during my firebase tutorial series. Now let's add Redux to it. After cloning you have to install the packages by doing
npm install
then
npm start
Yeah, Our project setup has been done now.
Now, Add the Redux Toolkit and React-Redux library
npm i --save @reduxjs/toolkit react-redux
Let's create our store.
Store:- Global state of our application
Create a new file store.js inside the Redux folder, and import the following method
import { configureStore } from "@reduxjs/toolkit";
What? are you thinking about createStore, forget it now.
configureStore: This is a method that accepts an object as a parameter. The first property of an object is a reducer which is an object.
import { configureStore } from "@reduxjs/toolkit";

export const store = configureStore({
reducer:{}
});
Our empty store has been created. Now We need to connect our React application with redux, for this open src/index.js, and import the Provider component and our store
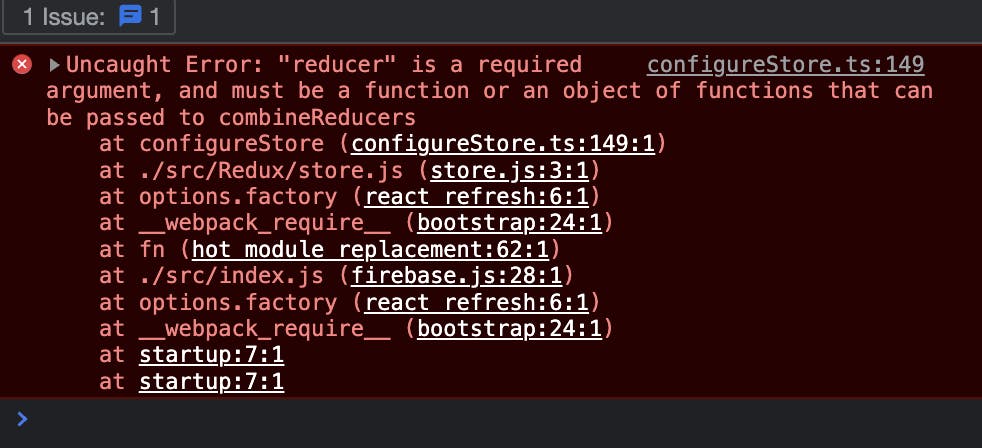
Note: Reducer is a required argument for store setup, you can pass it empty. If you don't pass the reducer then you will get this error
import { Provider } from 'react-redux';
import { store } from "./Redux/store";
Provider
A component that takes store as props and our complete app as children. This component connects our application with the Redux
Now wrap our component inside the Provider
 <Provider store={store}>
       <App />
  </Provider>
The final index.js file will now look like this
import React from "react";
import ReactDOM from "react-dom/client";
import "./index.css";
import App from "./App";
import reportWebVitals from "./reportWebVitals";
import { BrowserRouter } from "react-router-dom";
import { Provider } from "react-redux";
import { store } from "./Redux/store";

const root = ReactDOM.createRoot(document.getElementById("root"));
root.render(
   <React.StrictMode>
      <BrowserRouter>
         <Provider store={store}>
            <App />
         </Provider>
      </BrowserRouter>
   </React.StrictMode>
);

reportWebVitals();
Our redux setup has been completed, I will explain the concepts of the Redux toolkit with the help of this project, either you can clone it and follow, or you can follow with your project.
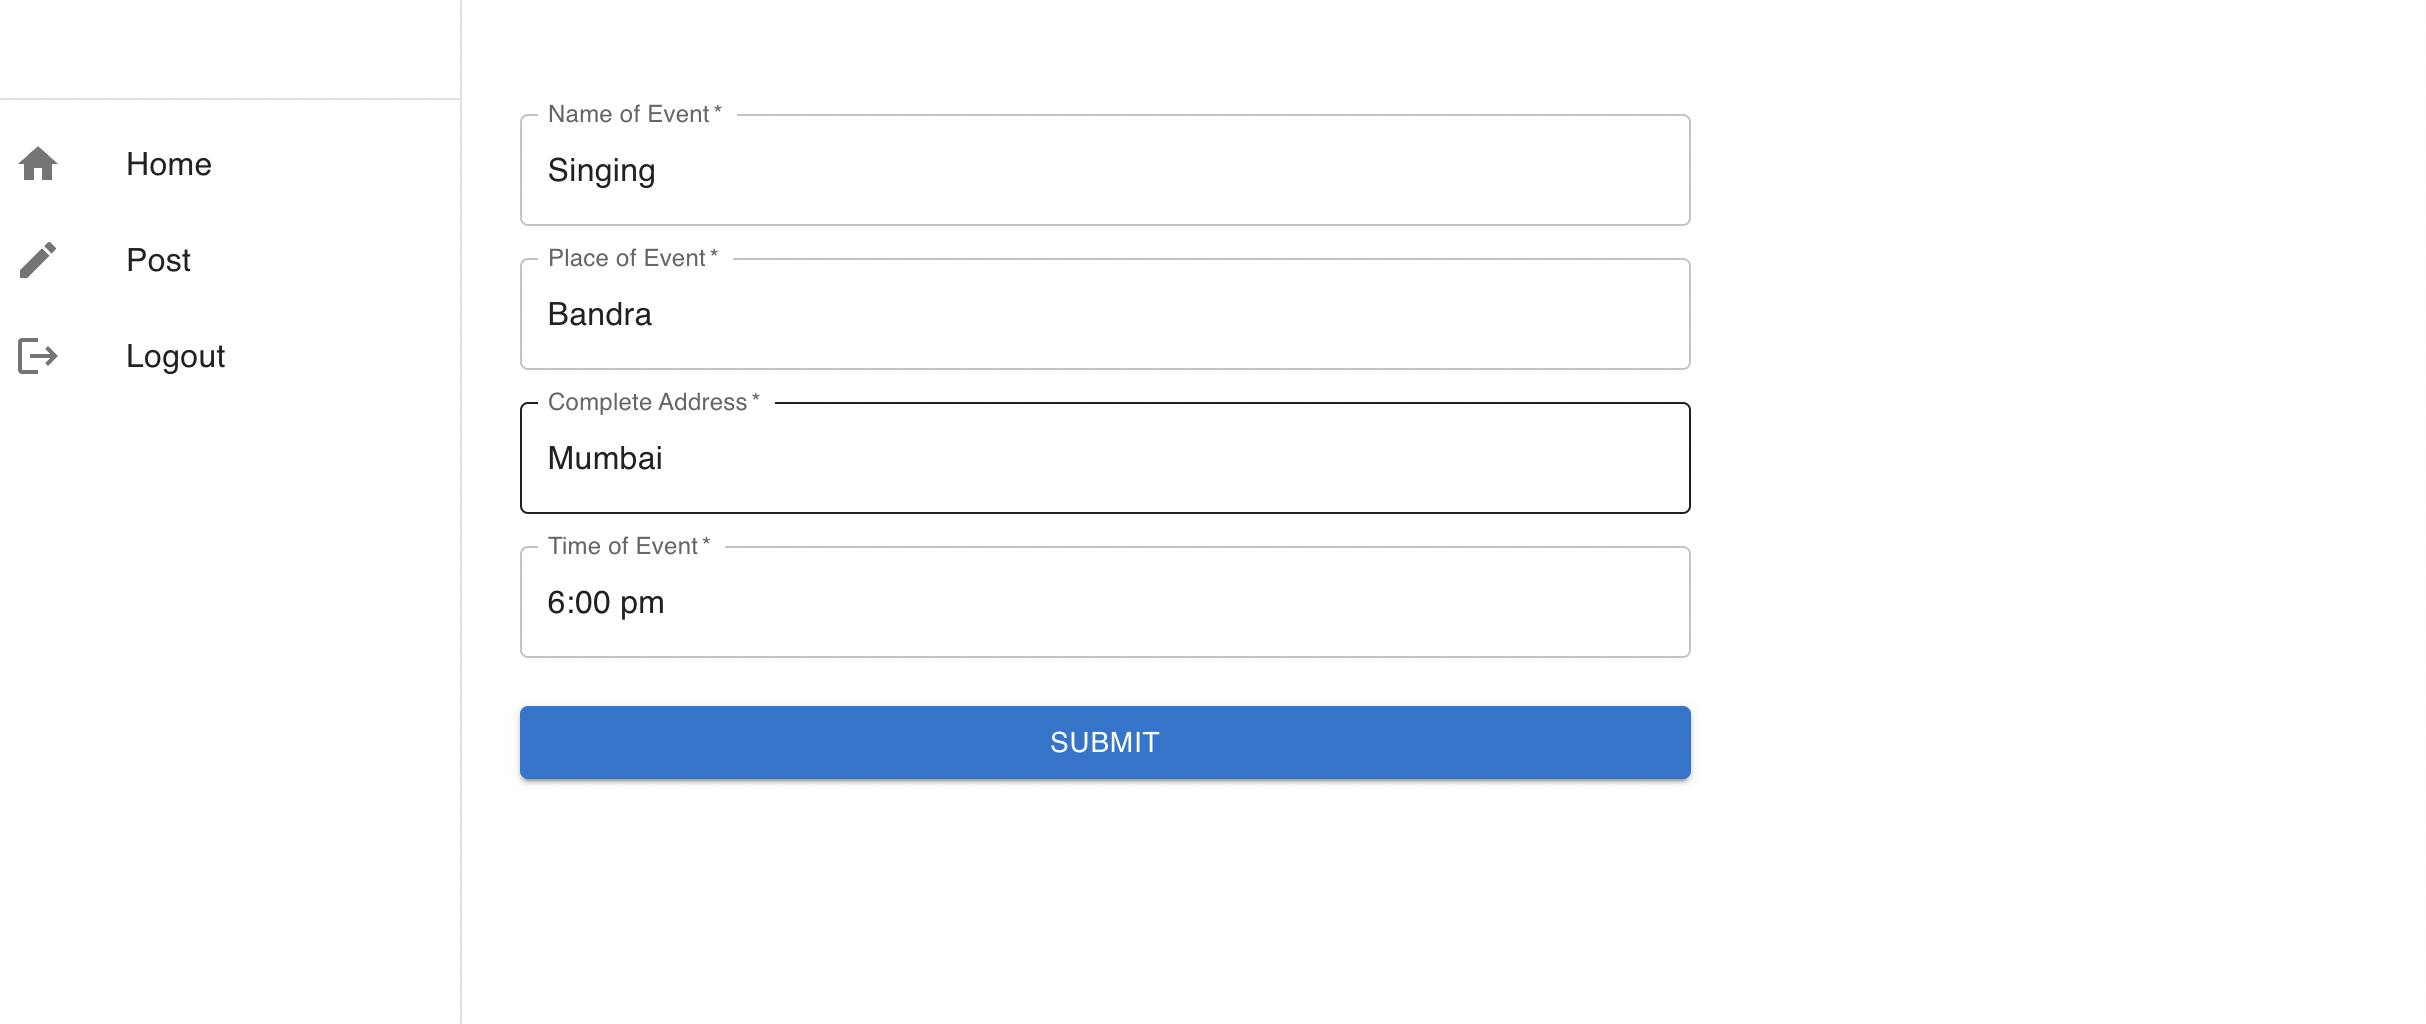
Requirement: This form belongs to this project, When I click on submit the data should be saved inside the store, and data should be visible in the Dashboard
Now we have to create a slice for that. So instead of creating a reducer and action, we only have to create a slice that internally creates the reducer and actions. That's it for the theory you will understand by this example
Create a file PostSlice.js inside redux, you can name it according to your requirement, adding a slice in the name is not mandatory
import { createSlice } from "@reduxjs/toolkit";
After importing, let's create our initial state for storing our data.
const initialState = {
   posts: [],
};
let's create our first Slice by calling the createSlice() method
CreateSlice
Accepts an object which should have three argument name, initialState, and reducer
const PostSlice = createSlice({
   name: "post",
   initialState,
   reducers: {

      },
   },
});
Inside this reducer, we have to add methods, let's add a method for our adding posts, In the parameter, we will get state and action
const PostSlice = createSlice({
   name: "post",
   initialState,
   reducers: {
      addPost: (state, action) => {
         state.posts = [...state.posts, action.payload];
      },
   },
});
Wait what, I directly mutated the state? Don't worry, It is not a mistake, we can mutate the state in the Redux Toolkit. Internally it uses a library Immer which reproduces an immutable state every time.
[...state.posts, action.payload]: Using the spread operator we are adding a new object in our posts array
similarly, you can use multiple methods in the reducer like removePost, or updatePost
const PostSlice = createSlice({
   name: "post",
   initialState,
   reducers: {
      addPost: (state, action) => {
         console.log(current(state).posts);
         state.posts = [...state.posts, action.payload];
      },
      removePost: (state, action) => {
         // code
      },
      updatePost: (state, action) => {
         // code
      },
   },
});
Our slice has been successfully created, Now this slice will provide us action and reducer
export const PostReducer = PostSlice.reducer;

export const { addPost } = PostSlice.actions;
Note: Action name should be the same as the method name that you defined inside the reducers
Our complete file will look like this
import { createSlice, current } from "@reduxjs/toolkit";

const initialState = {
   posts: [],
};

const PostSlice = createSlice({
   name: "post",
   initialState,
   reducers: {
      addPost: (state, action) => {
         console.log(current(state).posts);
         state.posts = [...state.posts, action.payload];
      },
      removePost: (state, action) => {
         // code
      },
      updatePost: (state, action) => {
         // code
      },
   },
});

export const PostReducer = PostSlice.reducer;

export const { addPost } = PostSlice.actions;
open src/Redux/store.js and add our reducer inside the store
import { configureStore } from "@reduxjs/toolkit";
import { PostReducer } from "./PostSlice";

export const store = configureStore({
   reducer: {
      post: PostReducer,
   },
});
Now everything has been completed, we have to send data to the reducer on the button click, open src/container/Posts/post.js and import our action from postSlice.js, and useDispatch hook from 'react-redux'
import { useDispatch } from "react-redux";
import { addPost } from "../../Redux/PostSlice";

const dispatch = useDispatch(); //
useDispatch
A hook that provides us dispatch function to dispatch our action and it is not mandatory that you have to name the variable as dispatch, you can name it anything
now on the buttonClick, we have to pass our data into dispatch
  const handleSubmit = () => {
      dispatch(addPost(eventDetails));
   };
final code will look like this
import React, { useEffect, useState } from "react";
import { useDispatch } from "react-redux";
import { addPost } from "../../Redux/PostSlice";
import PostForm from "./PostForm";

export default function Post() {
   const [eventDetails, setEventsDetails] = useState({
      name: "",
      place: "",
      address: "",
      time: "",
   });
   const dispatch = useDispatch();

   useEffect(() => {}, []);

   const handleSubmit = () => {
      dispatch(addPost(eventDetails));
   };

   return (
      <PostForm
         eventDetails={eventDetails}
         setEventsDetails={setEventsDetails}
         handleSubmit={handleSubmit}
         alert={alert}
      />
   );
}
Now the final part, to display data on our dashboard, open src/Container/Dashboard.js and import the useSelector hook from react-redux
useSelector:
Hook which accepts a selector function and provides state.
import { useSelector } from "react-redux";

 const eventDetails = useSelector((state) => state.post.posts);
The complete file will look like this
import { Box } from "@mui/system";
import React, { useEffect } from "react";
import { useSelector } from "react-redux";
import CustomCard from "../../Components/Cards/customCard";

export default function Dashboard() {
   const eventDetails = useSelector((state) => state.post.posts);

   const deleteEvents = (id) => {};

   return (
      <>
         <Box
            sx={{
               display: "flex",
               justifyContent: "flex-start",
               alignItems: "center",
               flexFlow: "wrap",
            }}
         >
            {eventDetails.length > 0 &&
               eventDetails.map((detail) => {
                  return (
                     <CustomCard details={detail} key={detail.id} deleteEvents={deleteEvents} />
                  );
               })}
         </Box>
      </>
   );
}
Our requirement has been fulfilled, Now let's talk about some key points about configureStore
Key Points
- Inside the reducer, we can pass any number of reducer, Configure Store internally called the combine reducers
export const store = configureStore({
   reducer: {
      post: PostReducer,
      cart: CartReducer, //example
      auth: AuthReducer, //example
   },
});
combineReducers: In Older redux approach we can only pass one reducer inside CreateStore() method, and if we have to use multiple reducers then we have to pass all the reducers inside the combine reducer and combine reducer to return a root reducer.
const rootReducer = combineReducers({reducer1, reducer2}) // Example older approach
- Now we do not need to configure thunk middleware inside the store, it is already configured internally and if you want to add some other middleware we can add middleware after reducers
export const store = configureStore({
   reducer: {
      post: PostReducer,
      cart: CartReducer, //example
      auth: AuthReducer, //example
   },
middleware: (getDefaultMiddleware) =>
      getDefaultMiddleware().concat(loggerMiddleware),
});
Note:- I just added loggerMiddleware as an example, We will discuss how to use thunk in the following article you will find the link at the bottom.
Thunk Middleware: If we want to do any asynchronous task after dispatching action then we can use this. More we will learn in part II
- Now you do not need to configure Redux Dev Tool, It is already configured inside the Redux Toolkit. you only need to install the extension
Redux Dev Tool: It is used to debug the redux flow. you can check my Redux Dev Tool article. For exploring Redux Dev Tools you can watch my youtube playlist
Second part: %[blog.amantomar.in/redux-toolkit-a-modern-re..